
D'idées créatives
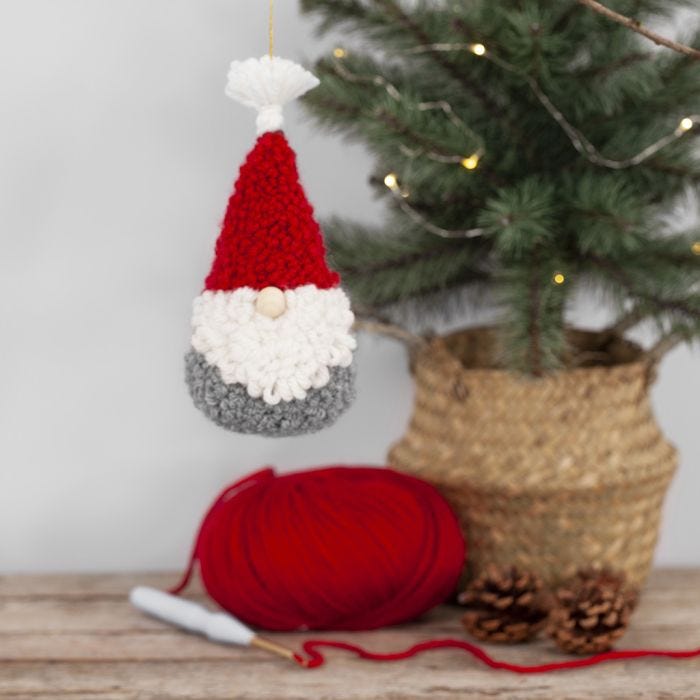
An elf hanging decoration embroidered with a punch needle
#v15754
Embroider this elf hanging decoration using the punch needle technique on aida fabric using Maxi woollen yarn. Fill the elf with polyester stuffing and decorate with a wooden bead for the nose.
#v15754
Comment faire
1 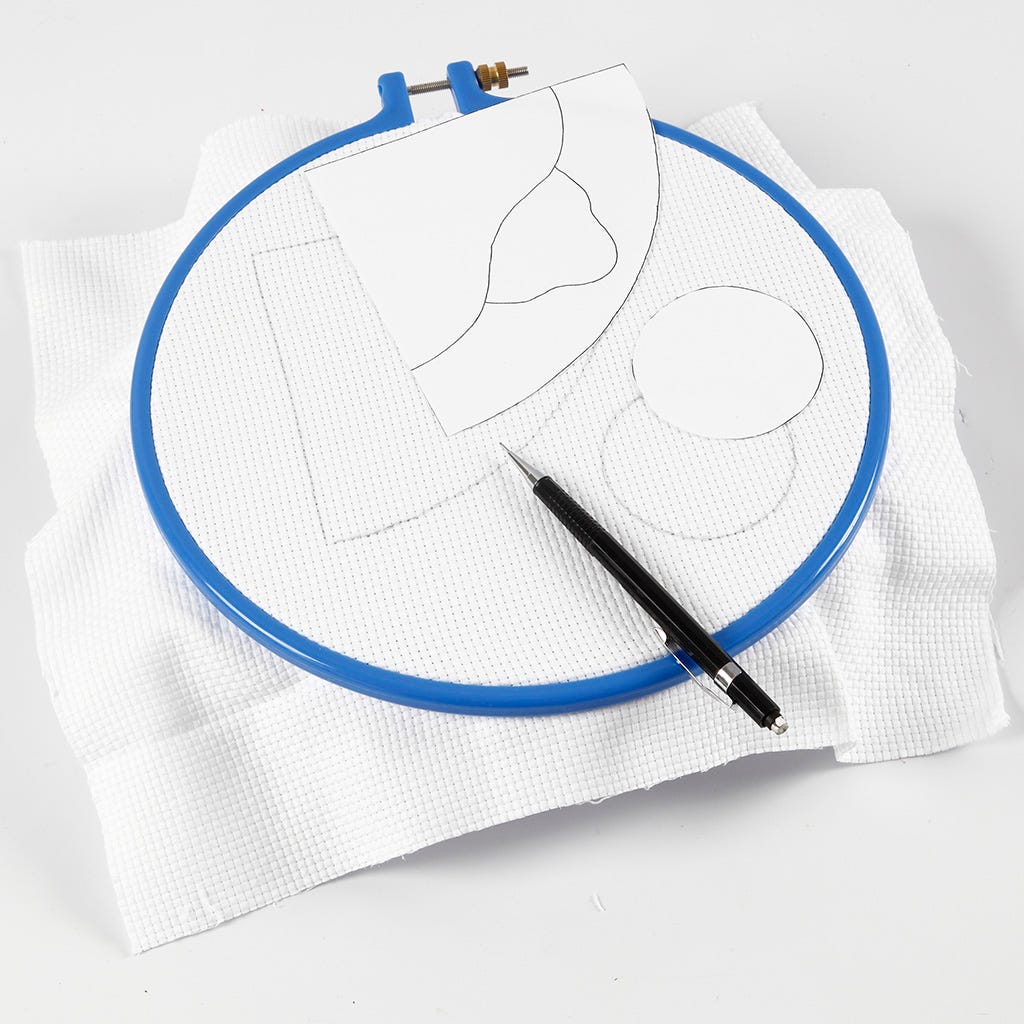 Cut out the templates which are available as a separate PDF file on this page. Secure the aida fabric in an embroidery hoop stand. Make sure that the quadrant-shaped template is placed on the aida fabric so that the straight edges are aligned with the holes in the aida fabric. Copy the shapes onto the aida fabric with a pencil.
Cut out the templates which are available as a separate PDF file on this page. Secure the aida fabric in an embroidery hoop stand. Make sure that the quadrant-shaped template is placed on the aida fabric so that the straight edges are aligned with the holes in the aida fabric. Copy the shapes onto the aida fabric with a pencil.2 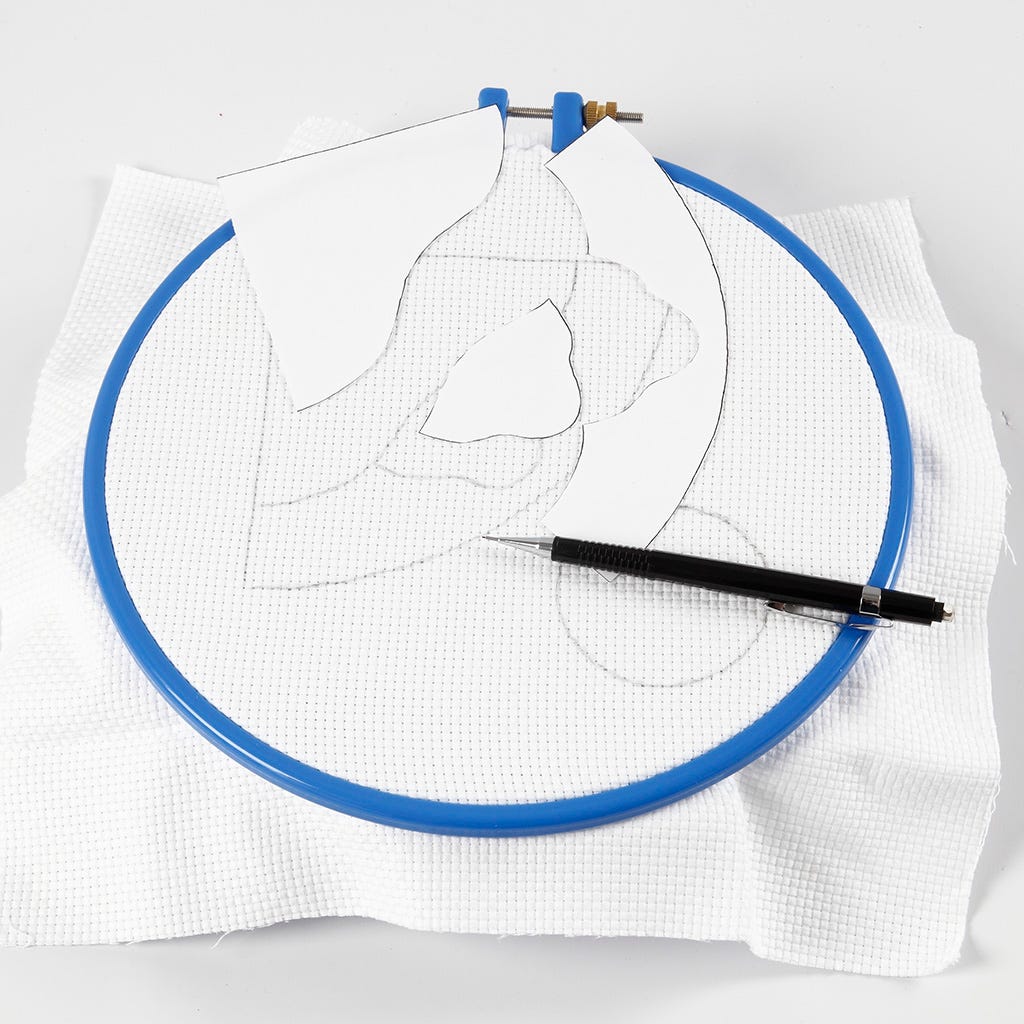 Cut the large template into small parts so that all the details of the template can be copied onto the aida fabric (inside the quadrant).
Cut the large template into small parts so that all the details of the template can be copied onto the aida fabric (inside the quadrant).3 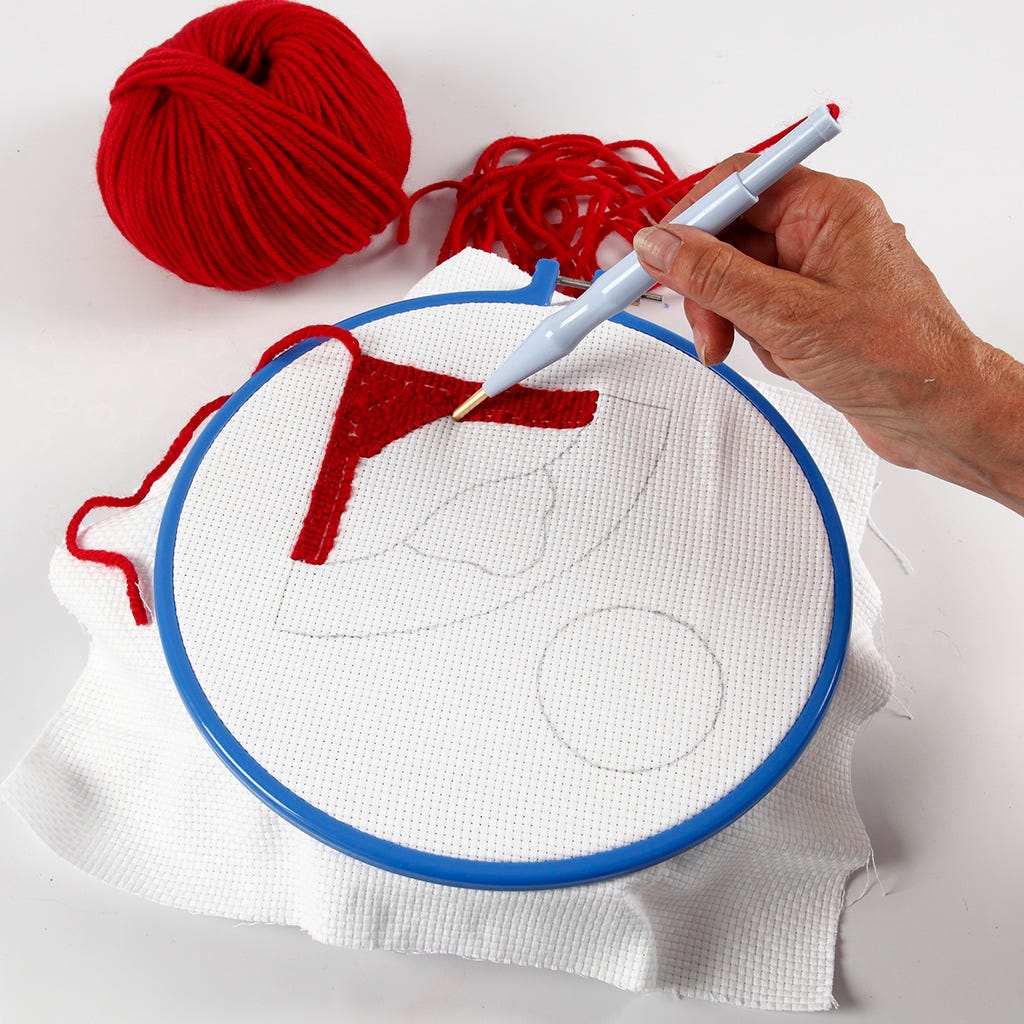 Thread the punch needle with the woollen yarn following the instructions on the packaging. Always make sure to have unwound lose wool from the ball of wool. Adjust the needle to setting 'D' (the shortest loops) and punch the needle through every hole in the aida fabric. Embroider the hat using red woollen yarn.
Thread the punch needle with the woollen yarn following the instructions on the packaging. Always make sure to have unwound lose wool from the ball of wool. Adjust the needle to setting 'D' (the shortest loops) and punch the needle through every hole in the aida fabric. Embroider the hat using red woollen yarn.4 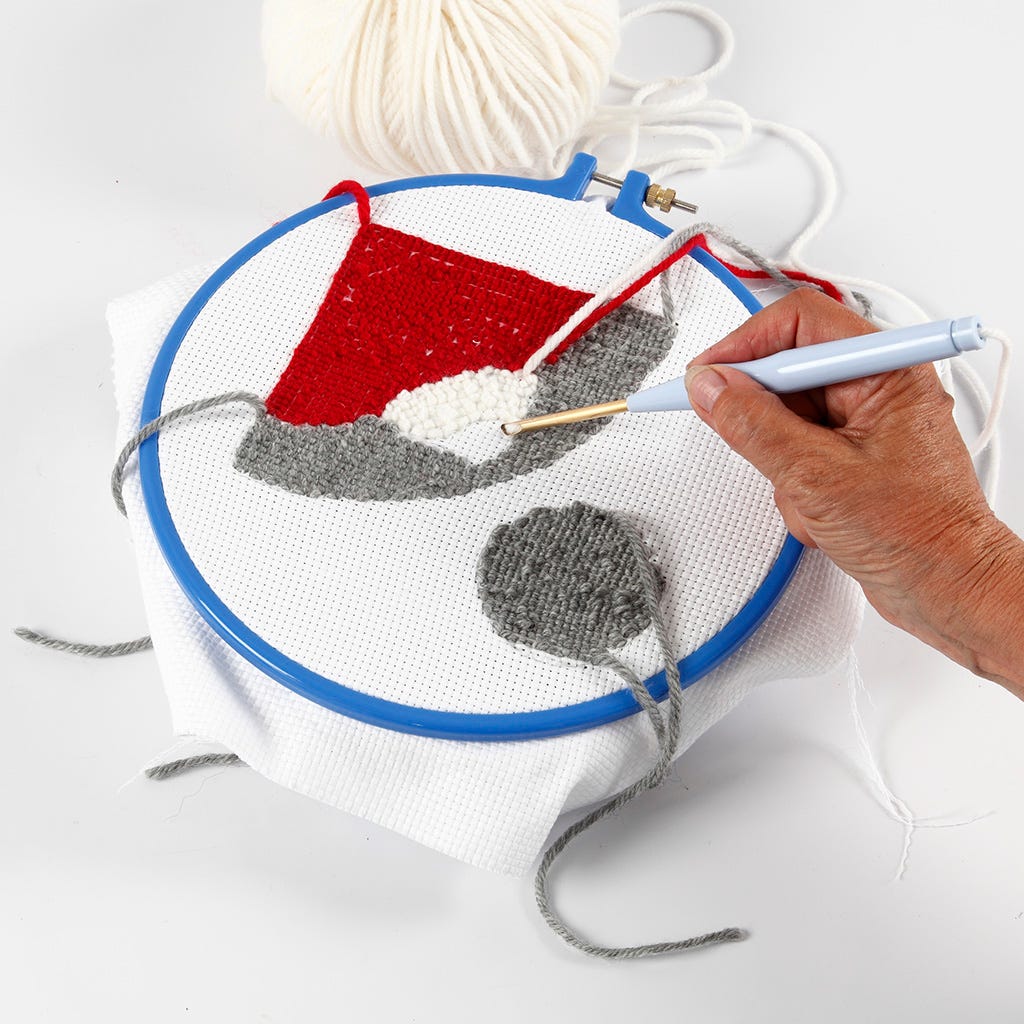 Use the same procedure when embroidering the jacket and the base (the small circle) with the punch needle using grey woollen yarn. Adjust the needle to setting 'B' and start at the top when embroidering the beard (the middle of the quadrant) with the punch needle using white woollen yarn. Adjust the needle to setting 'A' (long loops) when embroidering the lower part of the beard with the needle punch.
Use the same procedure when embroidering the jacket and the base (the small circle) with the punch needle using grey woollen yarn. Adjust the needle to setting 'B' and start at the top when embroidering the beard (the middle of the quadrant) with the punch needle using white woollen yarn. Adjust the needle to setting 'A' (long loops) when embroidering the lower part of the beard with the needle punch.5 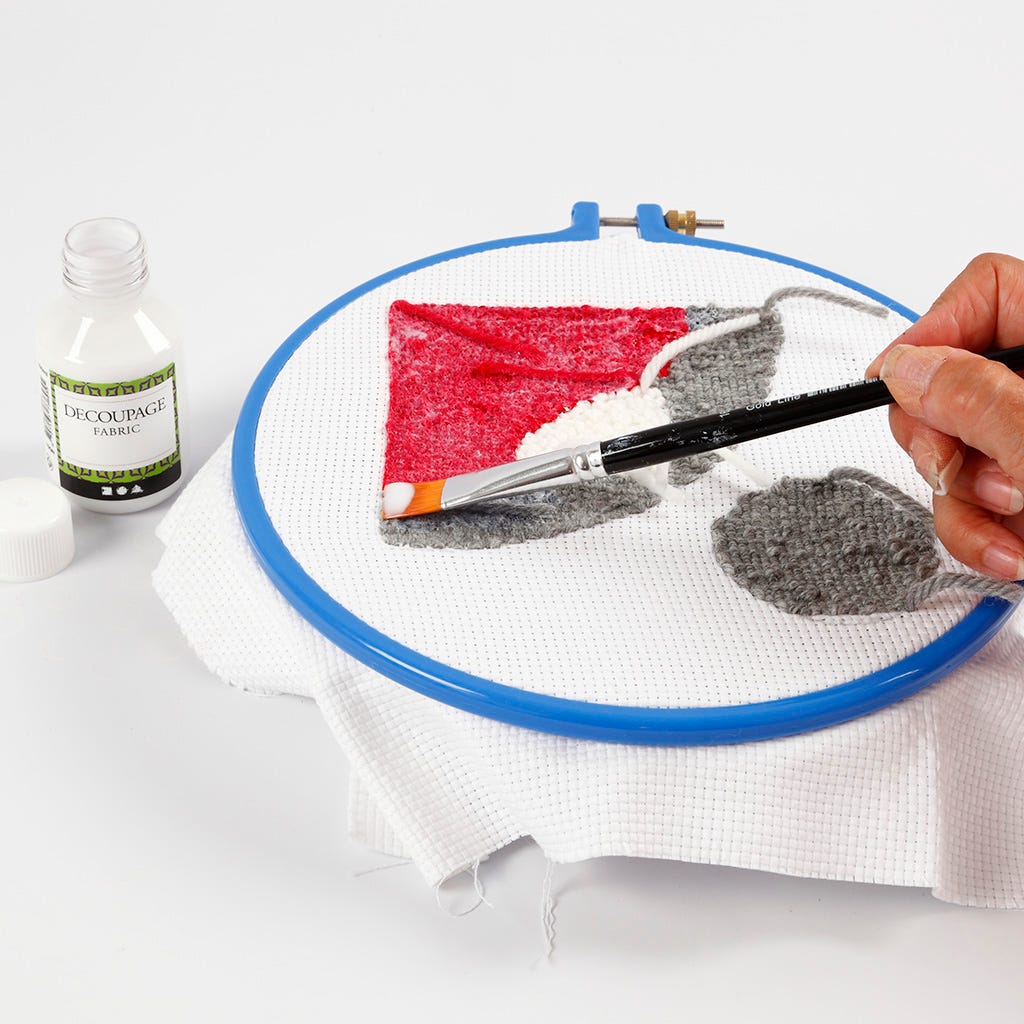 Trim the ends to 3-4 cm. Fix the wool on the back of the aida fabric using decoupage lacquer for fabric. Spread the decoupage lacquer all the way to the edge of the needle punched design, but not onto the aida fabric. Leave to dry.
Trim the ends to 3-4 cm. Fix the wool on the back of the aida fabric using decoupage lacquer for fabric. Spread the decoupage lacquer all the way to the edge of the needle punched design, but not onto the aida fabric. Leave to dry.6  Cut out the embroidered design from the aida fabric, leaving a 10-12 mm seam around the needle-punched design.
Cut out the embroidered design from the aida fabric, leaving a 10-12 mm seam around the needle-punched design.7 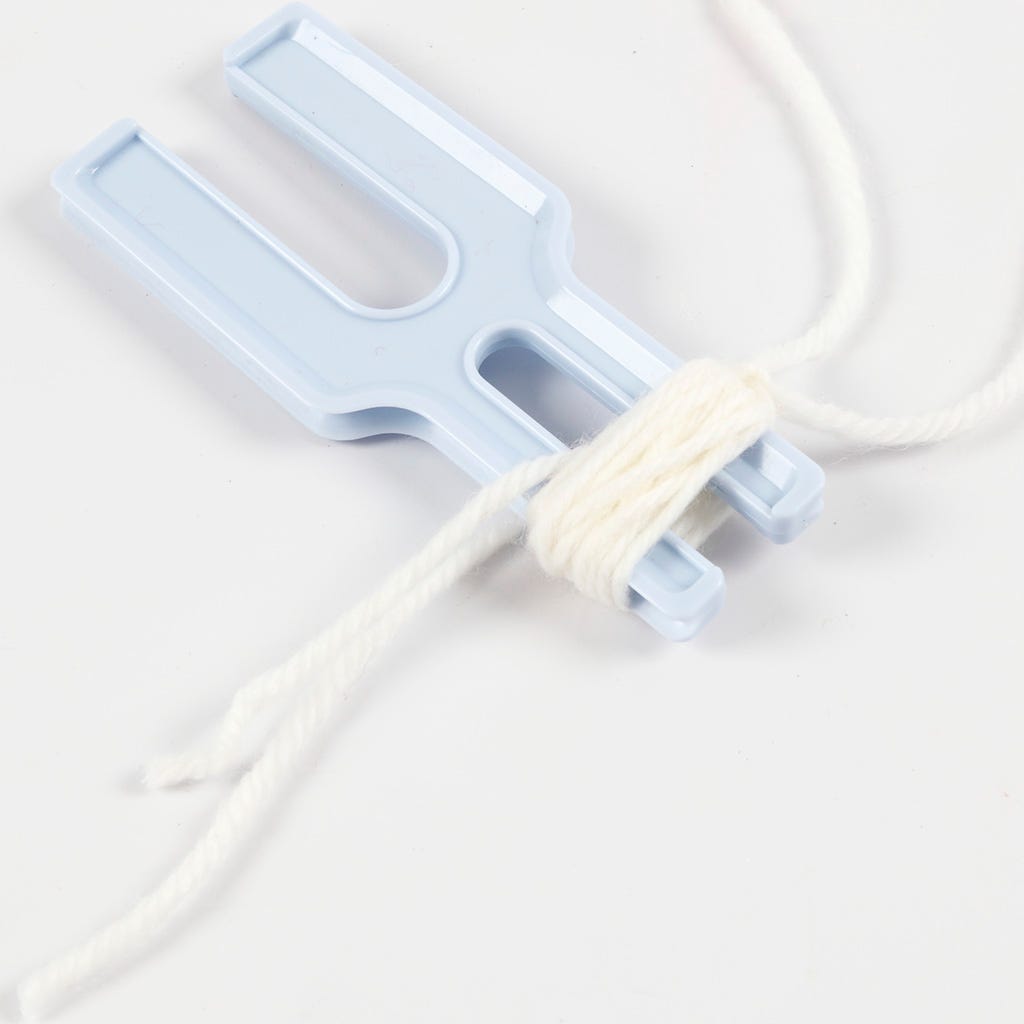 Make a tassel for the elf's hat using a pom-pom making tool. Wind white woollen yarn around the narrow end of the pom-pom making tool. Tie a tight knot around the wound bundle of wool at one side with a piece of wool. Pull the wound bundle off the fork and tie another knot tightly approx. 1 cm underneath first knot. Cut the wool open at the other end and trim the wool to your chosen length.
Make a tassel for the elf's hat using a pom-pom making tool. Wind white woollen yarn around the narrow end of the pom-pom making tool. Tie a tight knot around the wound bundle of wool at one side with a piece of wool. Pull the wound bundle off the fork and tie another knot tightly approx. 1 cm underneath first knot. Cut the wool open at the other end and trim the wool to your chosen length.8 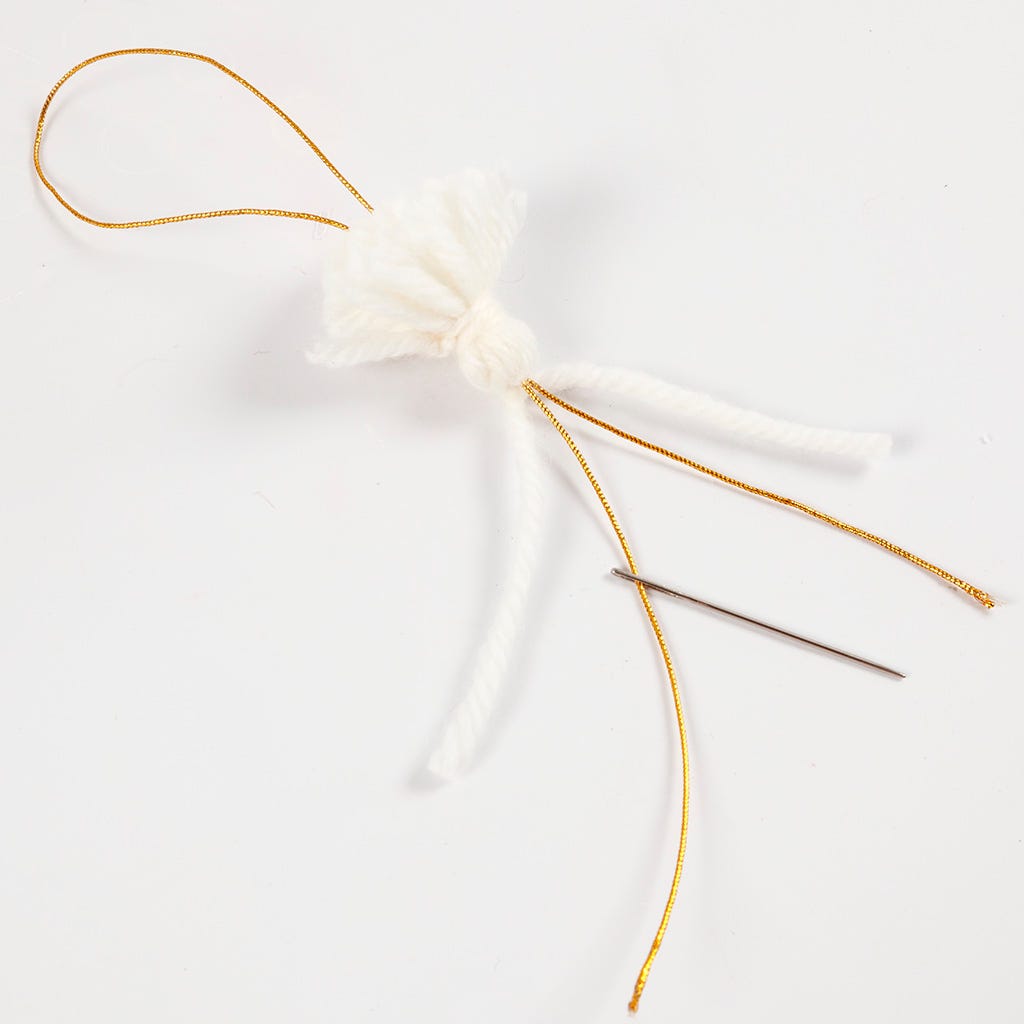 Feed a piece of gold thread through the tassel for hanging, creating a loop. Tie together.
Feed a piece of gold thread through the tassel for hanging, creating a loop. Tie together.9  Fold the corner of the aida fabric inward and secure with stitches. Sew the end of the tassel onto the needle-punched section as shown in the photo.
Fold the corner of the aida fabric inward and secure with stitches. Sew the end of the tassel onto the needle-punched section as shown in the photo.10  Sew a wooden bead onto the front at the top of the beard for the nose.
Sew a wooden bead onto the front at the top of the beard for the nose.11  Fold the embroidered section together to form a cone and fold the aida fabric inward.
Fold the embroidered section together to form a cone and fold the aida fabric inward.12  Sew the two sides of the aida fabric together, inserting the needle right through the wool, thus hiding the aida fabric. Hold the section flat whilst sewing. The sewn seam will be hidden by the wool once the cone is unfolded.
Sew the two sides of the aida fabric together, inserting the needle right through the wool, thus hiding the aida fabric. Hold the section flat whilst sewing. The sewn seam will be hidden by the wool once the cone is unfolded.13 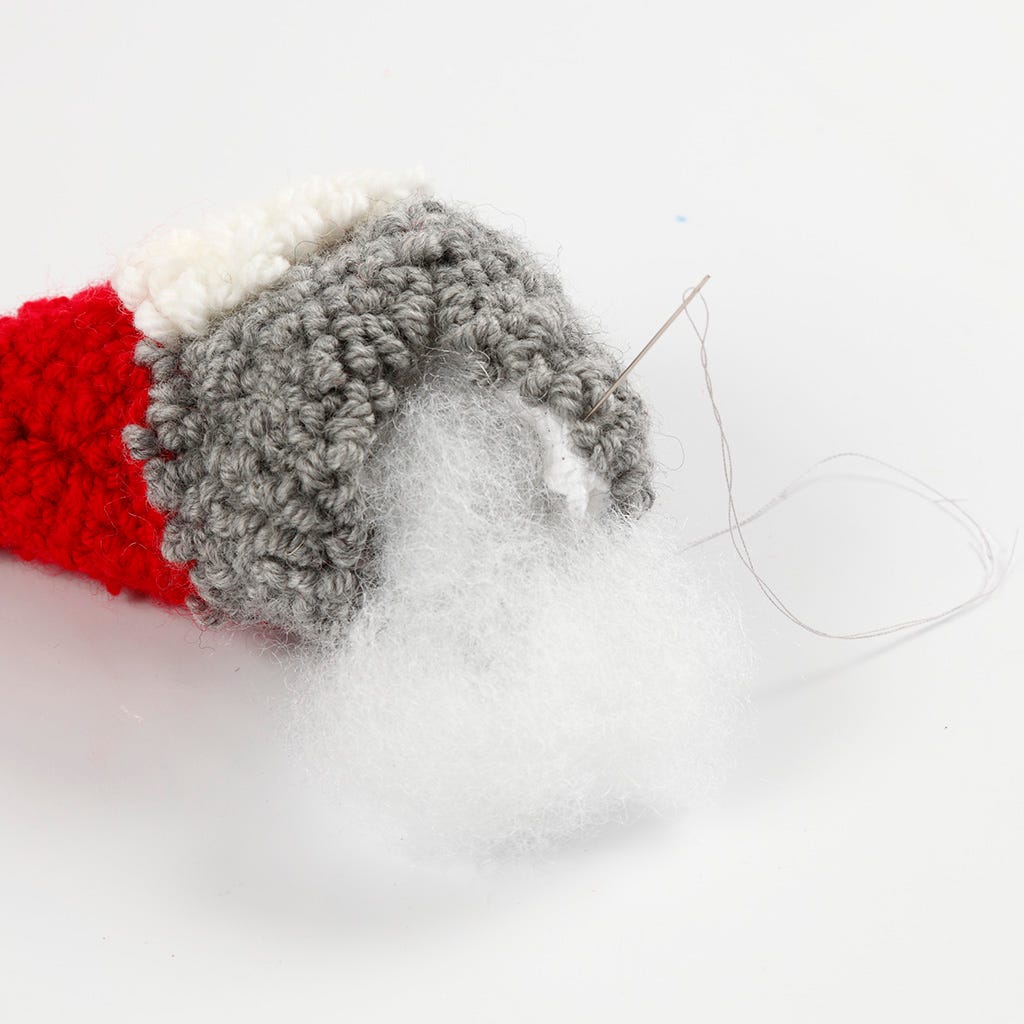 Sew the circular base onto the cone using the same technique as described above. Leave an opening and fill the elf with polyester stuffing. Sew the opening together.
Sew the circular base onto the cone using the same technique as described above. Leave an opening and fill the elf with polyester stuffing. Sew the opening together.Template  -
-
-Allez aussi explorer dans
