
Creatieve ideeën
Crepe paper poinsettia
#v15979
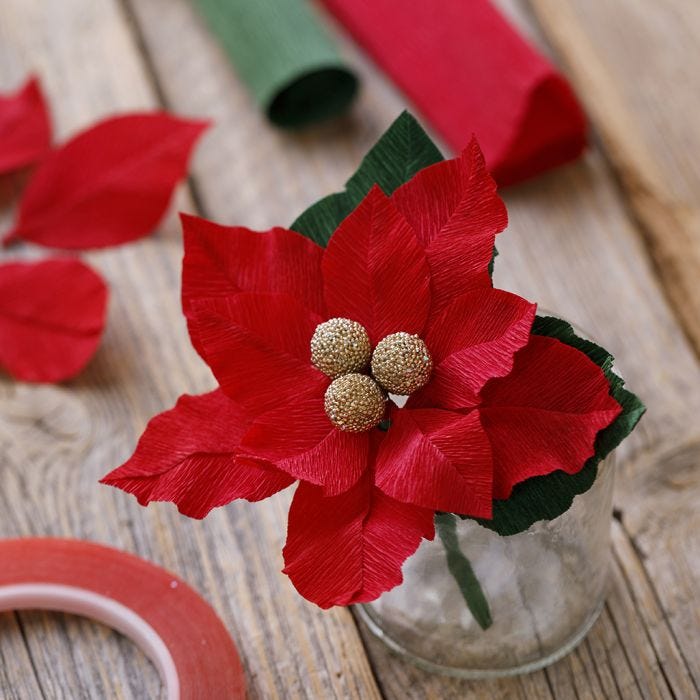
Make your very own crepe paper poinsettia with glitter berries.
#v15979
Hoe werkt het
1 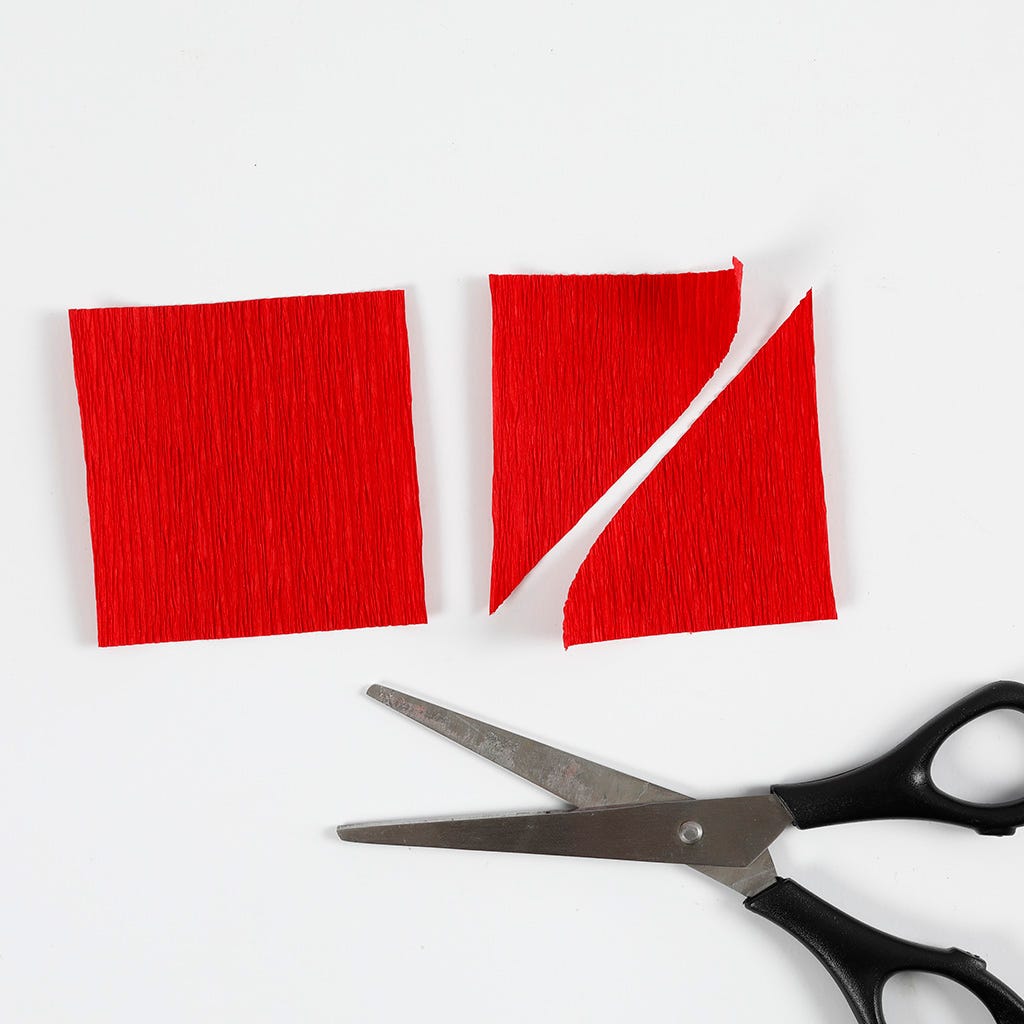 Print and cut out the template available as a PDF file at the bottom. Start by cutting out the square from crepe paper. Cut the square in half; from one corner to the other. You now have two triangles.
Print and cut out the template available as a PDF file at the bottom. Start by cutting out the square from crepe paper. Cut the square in half; from one corner to the other. You now have two triangles.2 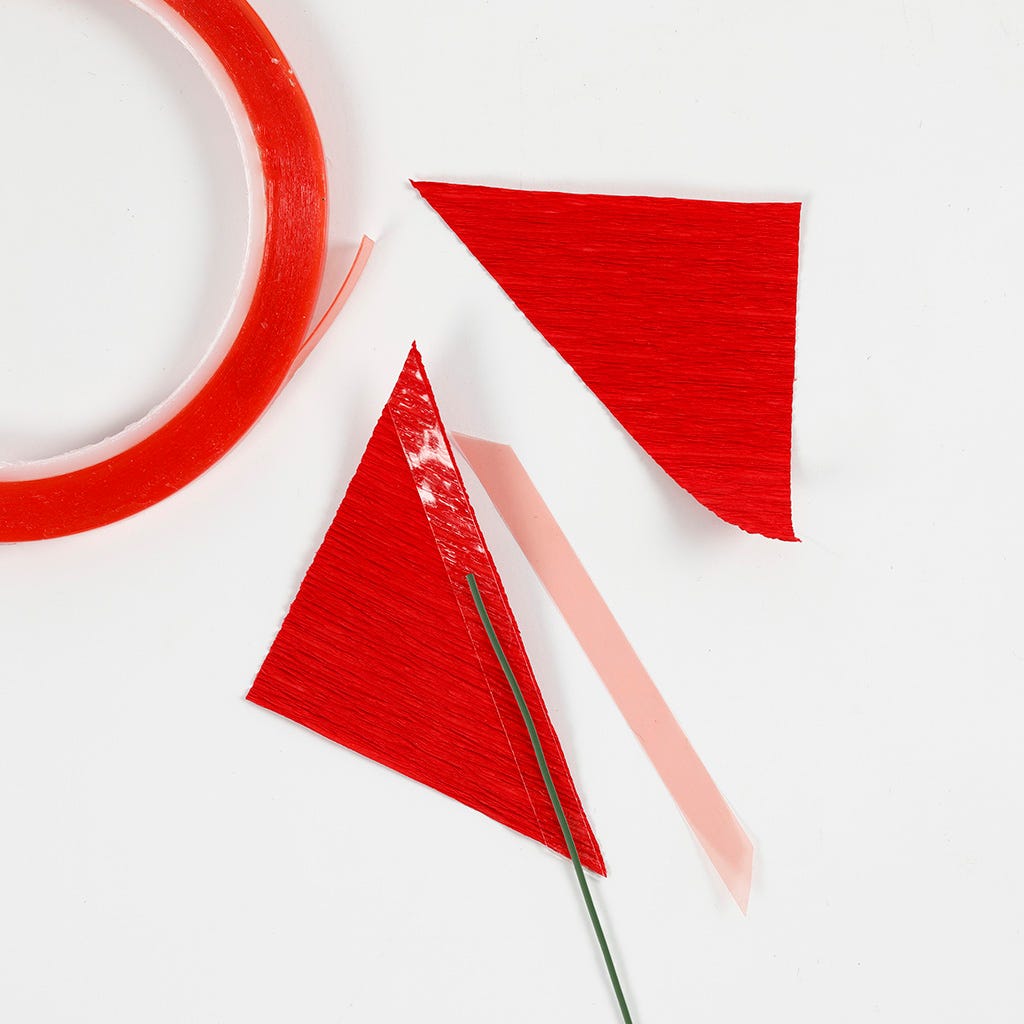 Arrange one triangle so that the lines in the crepe paper are angled upwards. Attach a piece of double-sided adhesive tape onto the longest side. Remove the protective film from the tape, exposing the adhesive. Push one end of the florist wire onto the adhesive tape, approx. 1 cm from the pointed end.
Arrange one triangle so that the lines in the crepe paper are angled upwards. Attach a piece of double-sided adhesive tape onto the longest side. Remove the protective film from the tape, exposing the adhesive. Push one end of the florist wire onto the adhesive tape, approx. 1 cm from the pointed end.3 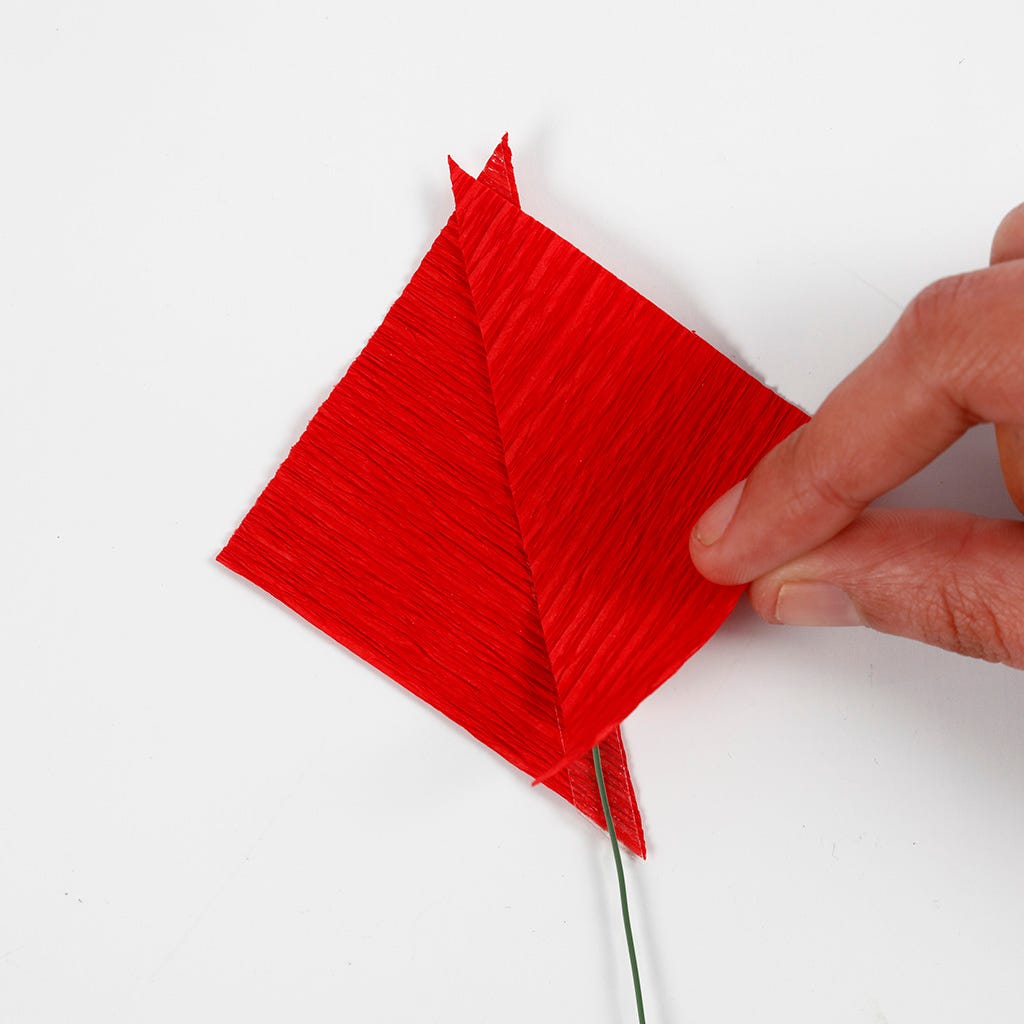 Press the other triangular piece of crepe paper on top of the double-sided adhesive tape and the florist wire, overlapping sufficiently to hide the double-sided adhesive tape. NB: Attach the piece of crepe paper at the right angle, so that the paper is arranged in an arrow pattern towards the middle.
Press the other triangular piece of crepe paper on top of the double-sided adhesive tape and the florist wire, overlapping sufficiently to hide the double-sided adhesive tape. NB: Attach the piece of crepe paper at the right angle, so that the paper is arranged in an arrow pattern towards the middle.4 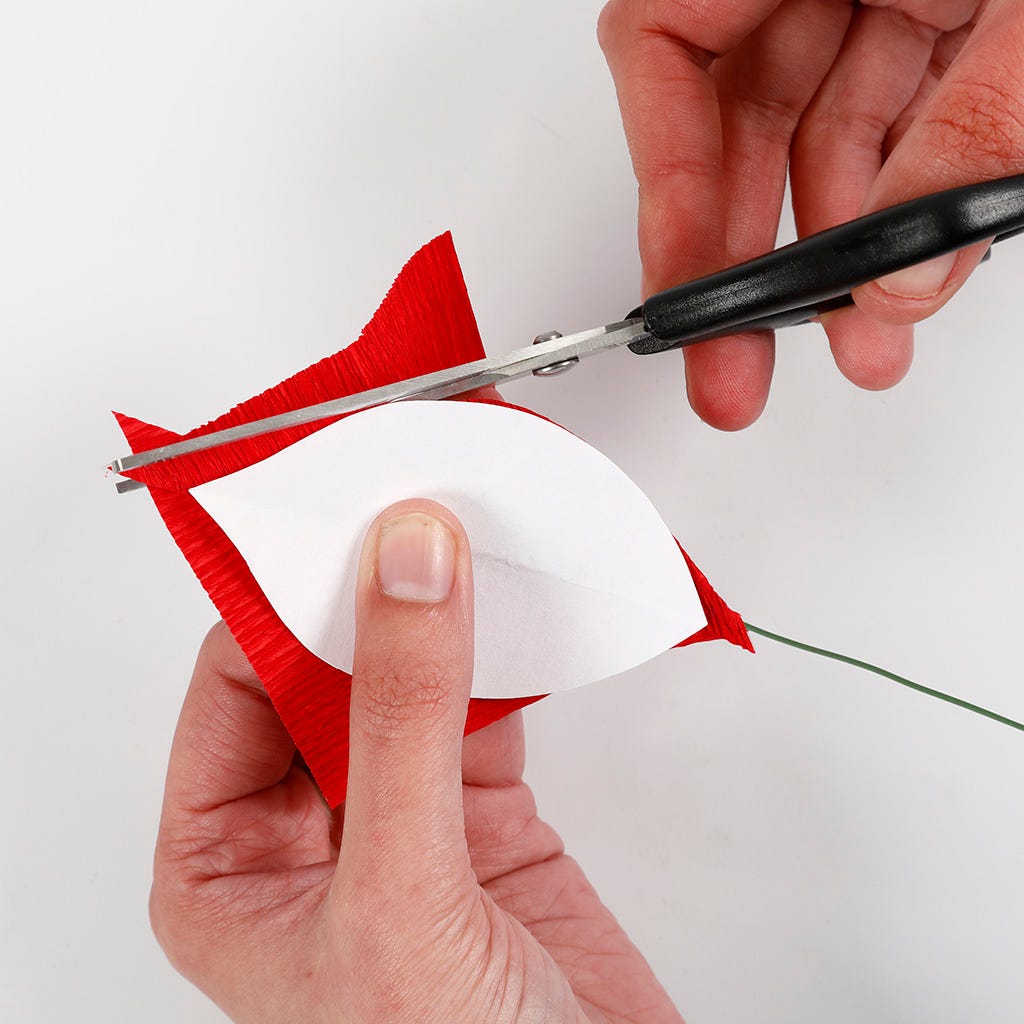 Cut out the petal. Make sure to use the correct petal template for the correct size of square. Place the petal template on top of the crepe paper square and cut out. Leave the bottom slightly untrimmed, ensuring you don't accidently cut off the florist wire. You may twist the excess crepe paper around the florist wire.
Cut out the petal. Make sure to use the correct petal template for the correct size of square. Place the petal template on top of the crepe paper square and cut out. Leave the bottom slightly untrimmed, ensuring you don't accidently cut off the florist wire. You may twist the excess crepe paper around the florist wire.5 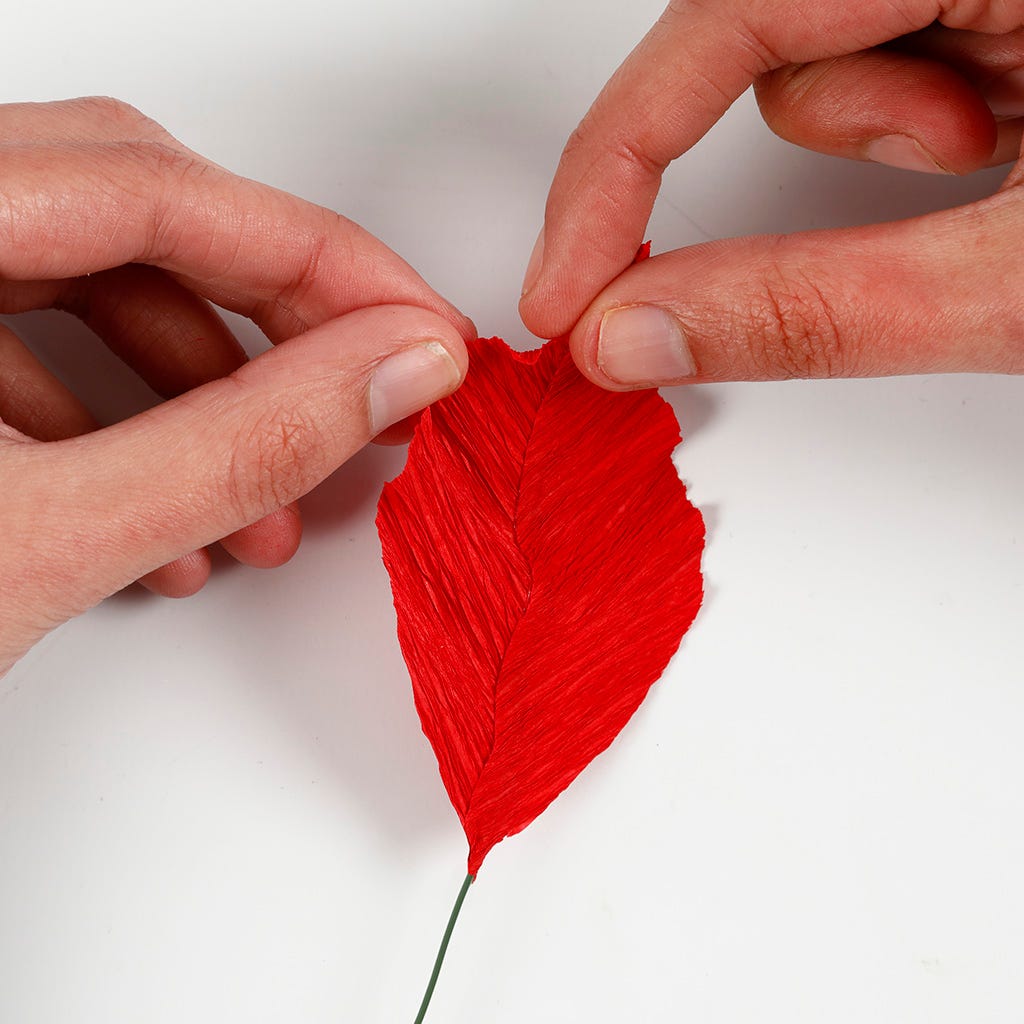 Shape the sides of the petal by slightly pulling and stretching the crepe paper to make a wavy edge.
Shape the sides of the petal by slightly pulling and stretching the crepe paper to make a wavy edge.6 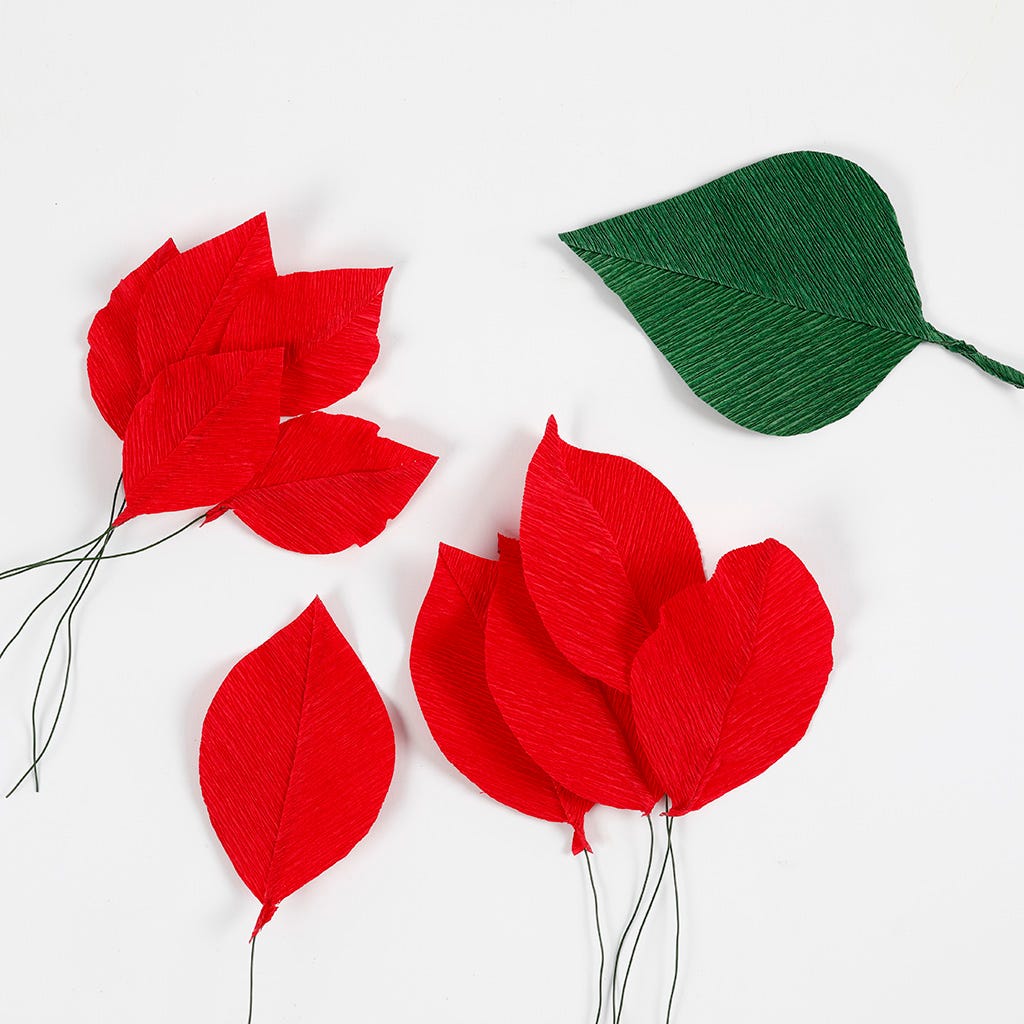 Continue like this, making a total of five large and five small petals. Make green leaves in the same way.
Continue like this, making a total of five large and five small petals. Make green leaves in the same way.7 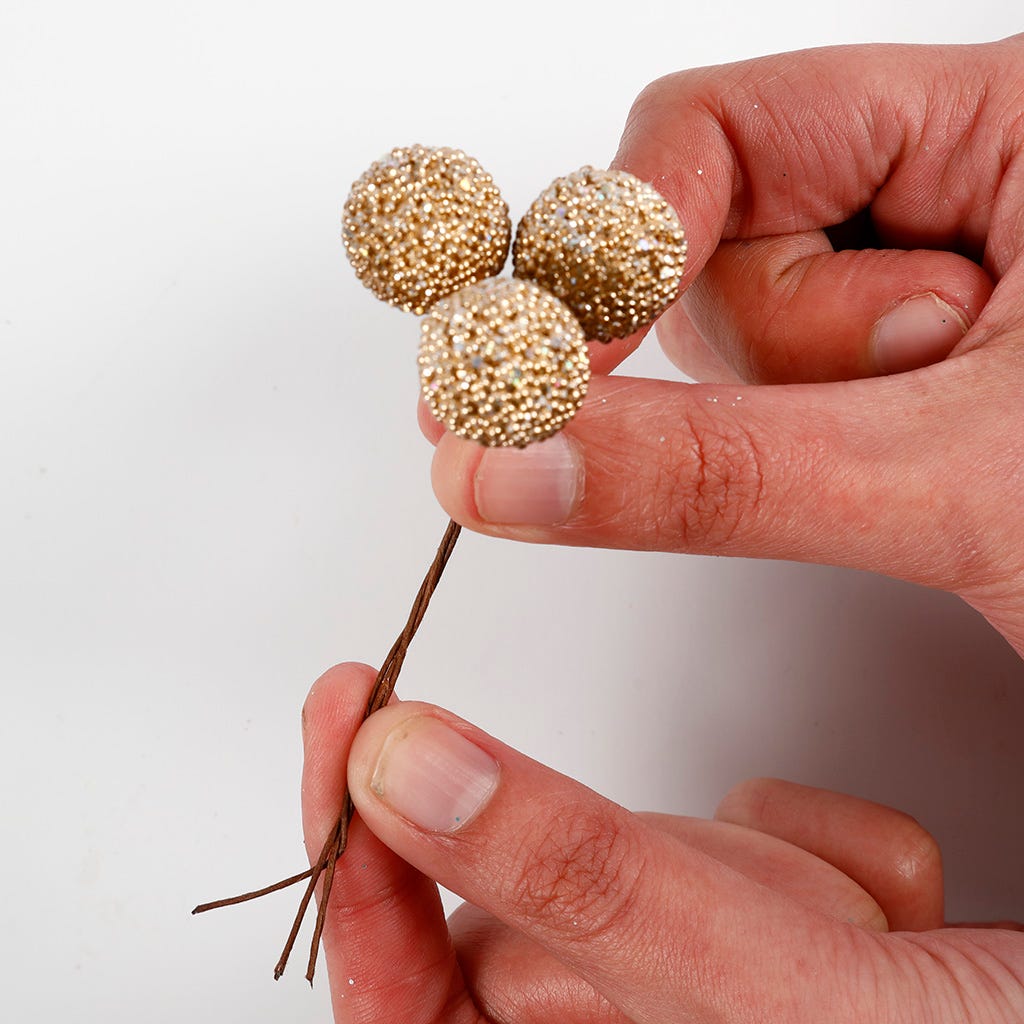 For the centre of the poinsettia you will need three artificial glitter berries. Twist the stems tightly around each other, so that the berries are arranged tightly together.
For the centre of the poinsettia you will need three artificial glitter berries. Twist the stems tightly around each other, so that the berries are arranged tightly together.8 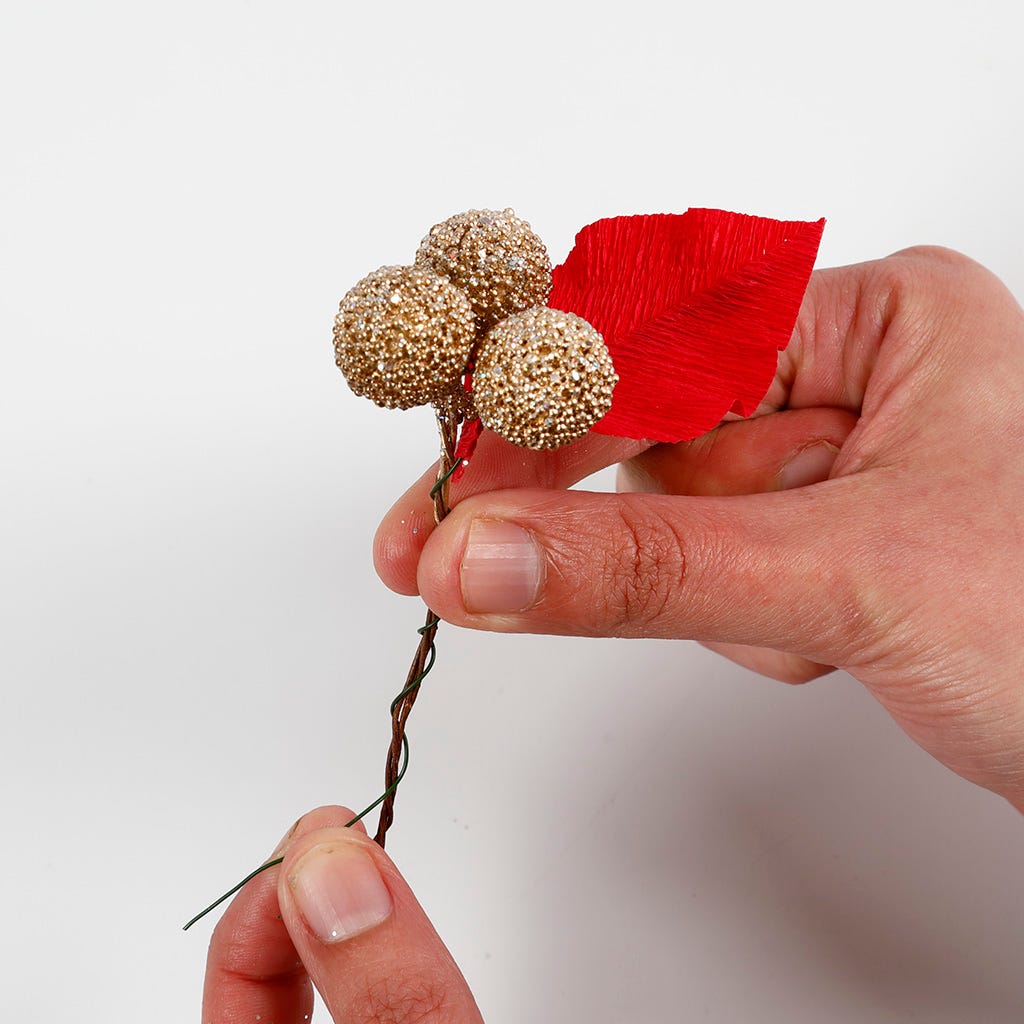 Secure one of the small petals onto the berries by twisting the florist wire around the stem of the berries. Straighten the petal so that it points outwards.
Secure one of the small petals onto the berries by twisting the florist wire around the stem of the berries. Straighten the petal so that it points outwards.9 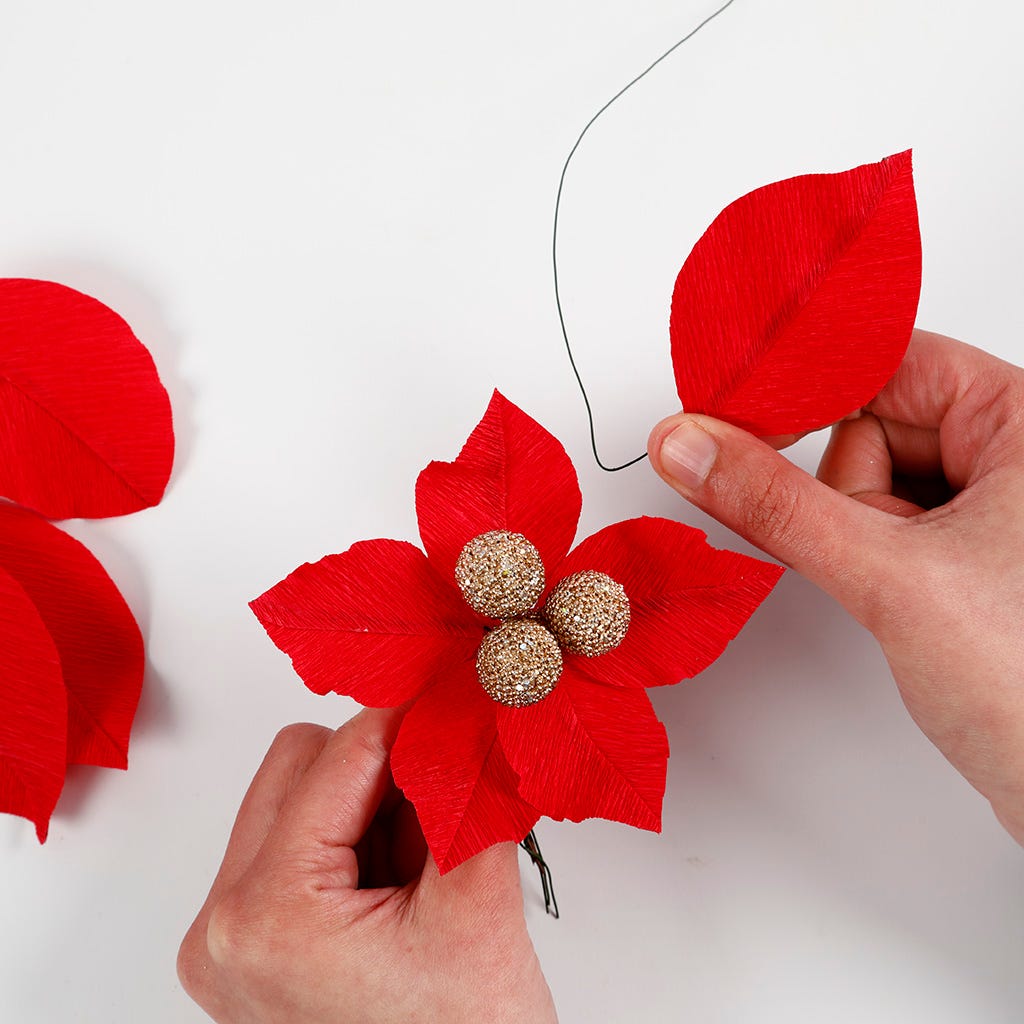 Twist the other small petals around the berries, to form the first layer of the poinsettia. Attach each of the large petals between two small petals, twisting the florist wires around the stem of the berries and completing the second layer of the poinsettia. Attach the green leaves in the same way.
Twist the other small petals around the berries, to form the first layer of the poinsettia. Attach each of the large petals between two small petals, twisting the florist wires around the stem of the berries and completing the second layer of the poinsettia. Attach the green leaves in the same way.10 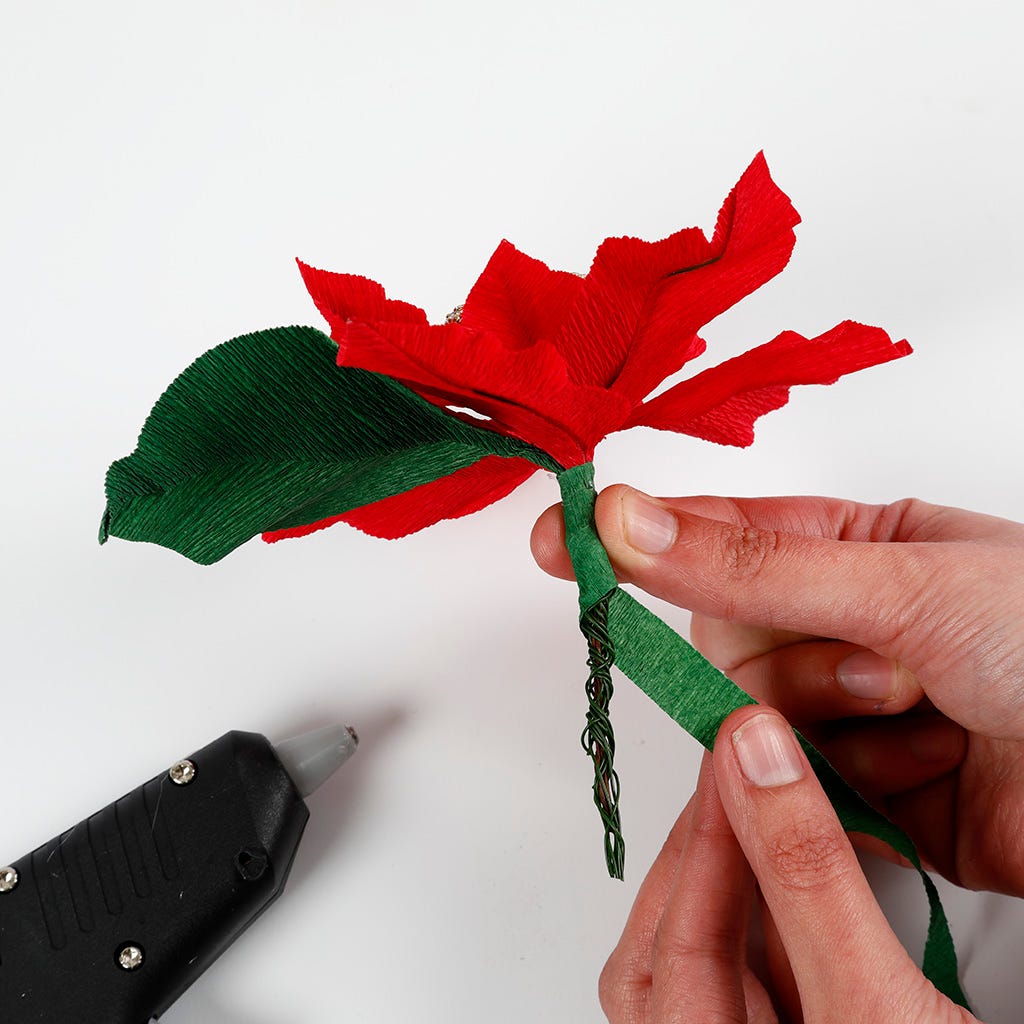 Cut an approx. 1 x 15 cm piece of green crepe paper. Stretch it out and cover the florist wires by wrapping the crepe paper at an angle around it, securing with blobs of glue from a glue gun at a low temperature setting as you go along.
Cut an approx. 1 x 15 cm piece of green crepe paper. Stretch it out and cover the florist wires by wrapping the crepe paper at an angle around it, securing with blobs of glue from a glue gun at a low temperature setting as you go along.11 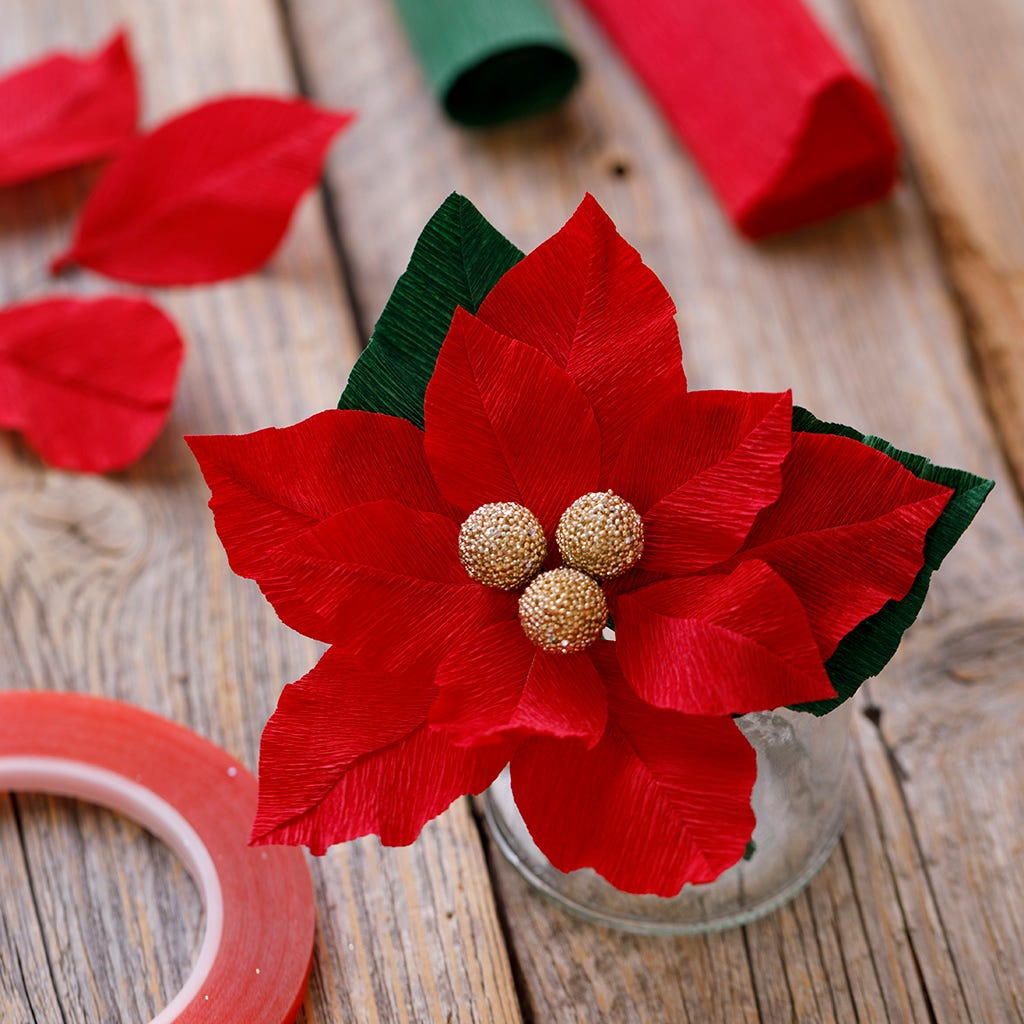 The finished poinsettia. A tip: Bend the florist wire in all the petals so that the poinsettia appears more life like.
The finished poinsettia. A tip: Bend the florist wire in all the petals so that the poinsettia appears more life like.Template  Print the template here.
Print the template here.Kijk ook bij
